In this article
Picture this: you are standing in your half-finished kitchen with a contractor’s clipboard, twenty-four cabinet doors staring back at you, and a hardware catalogue the thickness of a phone book in your hand. You have already picked the cabinets. You have already picked the counters. And now someone needs an answer on whether you want polished brass cup pulls or 5-inch matte black bar handles before Friday, because the order has to ship from a warehouse in Mississauga so the installer can mount everything next week.
Cabinet hardware is the one decision most homeowners under-plan. It is a small purchase relative to the cabinets themselves, but it is the thing your hand touches twenty times a day. Get it right and the kitchen feels finished. Get it wrong and you are squinting at every drawer pull for three years wondering why the room does not quite hang together. Here is a practical guide for choosing kitchen cabinet hardware in 2026, from a team that hangs it on real Mississauga kitchen renovations every week.
Quick take
If you remember nothing else: match the metal finish of your faucet and lighting before you fall in love with a finish, plan on roughly one pull per drawer plus one knob per cabinet door (so a typical 25-door kitchen needs about 40 pieces), and budget 8 to 18 dollars per piece for mid-range quality that feels solid in the hand and lasts a decade.
What cabinet hardware actually is
Cabinet hardware is the bucket term for every piece you grip, twist or push to open a cabinet, drawer, pantry or vanity. The four main families are knobs (a single round or geometric piece, one screw), pulls (a horizontal bar with two screws), cup pulls (a half-moon that opens upward, mounted to drawer fronts), and edge pulls (an L-shaped piece fitted under the top edge of a door, sometimes called finger pulls). Hinges, slides and soft-close mechanisms are technically hardware too, but they live inside the cabinet box and are not visible. When most people say cabinet hardware they mean the exposed pulls and knobs that decorate the door fronts.
One thing worth knowing before you shop: in 2026 the line between knob and pull is getting blurry. Manufacturers like Top Knobs, Berenson and Atlas are releasing hybrid pieces that look like elongated knobs or shrunken pulls. That is fine for visual variety, but it can throw off your symmetry if you mix them inconsistently across a single run of cabinets.
Did you know
The average North American home cook opens and closes a kitchen drawer or door roughly 70 times during a single dinner prep, according to ergonomic studies cited by the National Kitchen and Bath Association. That number is why hardware that feels good in the hand is not a luxury concern. The finish you pick will collect oils, fingerprints and dish soap thousands of times a year.
How it works: mounting, function, ergonomics
Every piece of cabinet hardware is mounted from the inside out. The installer drills through the cabinet door or drawer front with a jig (a small template that ensures every hole lines up), then drives a machine screw through the back of the door. The screw threads into the back of the knob or pull. Standard machine screw lengths are 1 inch for typical Shaker doors and 1.25 or 1.5 inch for thicker custom doors. Order the wrong length and you will be standing at the cabinet with a pull that will not tighten because the screw bottoms out before it grips. Always order a small bag of replacement screws in two lengths.
Pulls are measured by their centre-to-centre distance: the gap between the two screw holes, not the overall length of the piece. A 96 mm pull (about 3.75 inches centre-to-centre) is a common drawer size. A 160 mm pull (6.3 inches) suits wider drawers and lower cabinet doors. Knobs only need one hole, so they are more forgiving if you change your mind later. Cup pulls open upward and mount with two screws, but the design hides the screw heads under a lip.
Ergonomics matter more than people realize. If you have arthritis, long fingernails or kids who use the kitchen, choose a bar pull or cup pull over a small round knob. Pulls give you four fingers of grip versus a pinch grip on a knob. We see a lot of Oakville and Burlington homeowners over 60 who originally picked decorative knobs for aesthetics and switched to pulls within two years because the knobs were hard to grasp with wet hands.
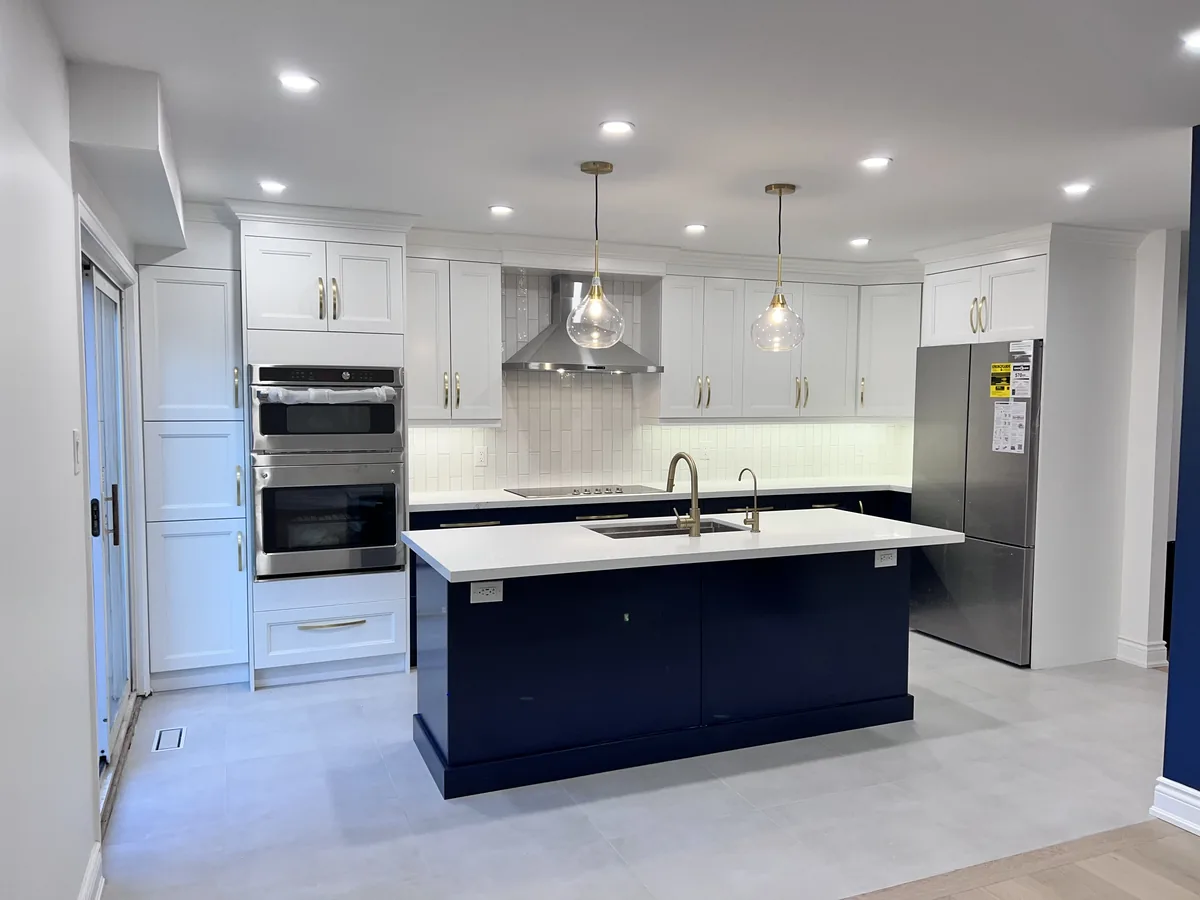
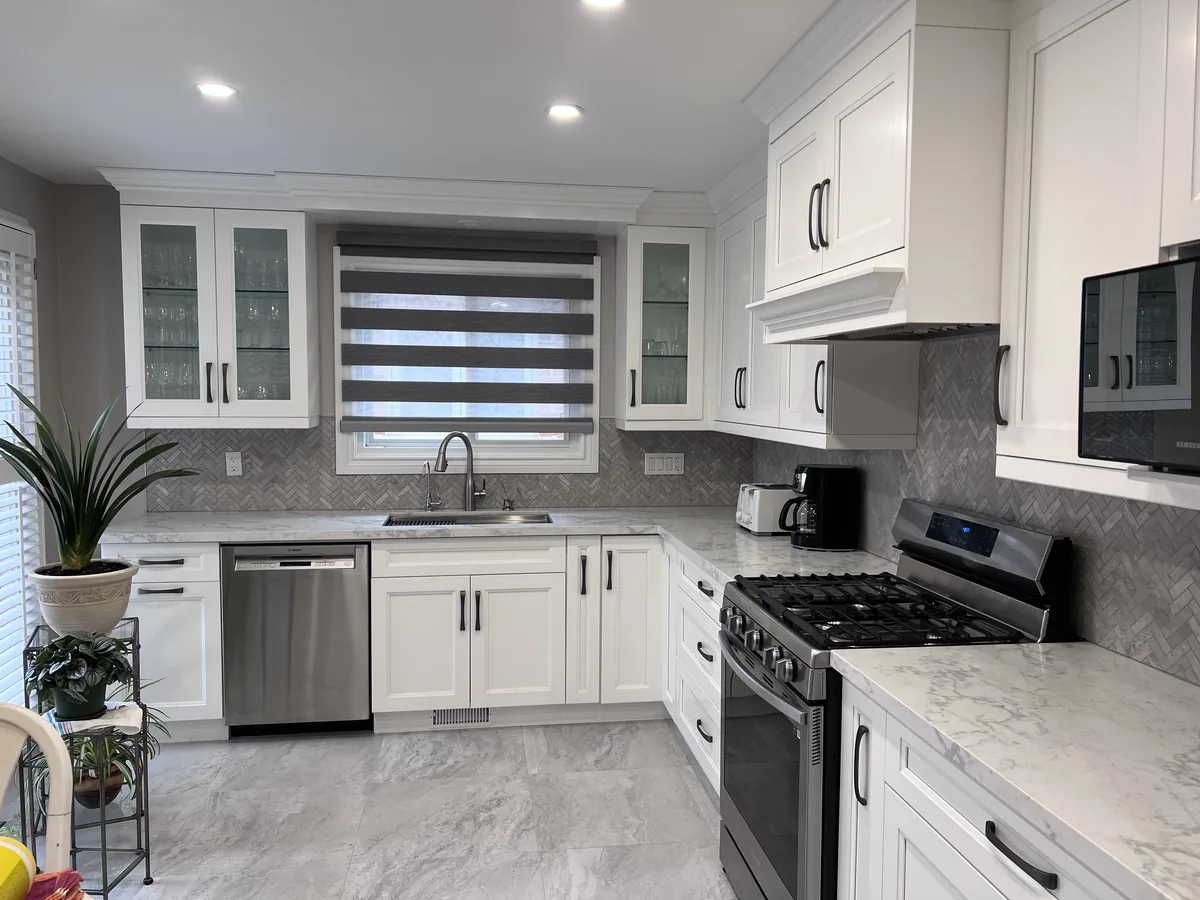
Who each style is for
Style is the most personal part of the decision, but it is also the part where you can borrow logic from your existing space. The kitchen sets the tone, and hardware can either reinforce that tone or quietly contradict it.
Knobs
Knobs suit upper cabinets, traditional or transitional kitchens, and anyone who likes the look of small jewelry-like details. They are the most budget-friendly option (often 3 to 8 dollars at the builder-grade tier) and the easiest to swap later. If you are refacing an older kitchen and want the cheapest visual update, knobs are it. Where they do not shine: heavy drawers, modern minimalist kitchens, and anyone who finds small grips annoying.
Bar pulls
The dominant choice in modern and transitional kitchens. Bar pulls sit flush against the door, give a confident four-finger grip and read as both contemporary and timeless. They look at home on flat-panel doors, Shaker doors, and even some traditional styles. If you are renovating a kitchen with no specific design history (most homes built in the GTA between 1985 and 2010 fall into this bucket), bar pulls are the safest universal pick.
Cup pulls
Cup pulls belong on drawers. They look beautiful on traditional, farmhouse and vintage kitchens, and they have a satisfying weight when you pull them open. Avoid them on doors (they are awkward to use vertically) and on ultra-modern flat-panel kitchens where they read as fussy. They are often paired with knobs on the doors and cup pulls on the drawers, a combo that has been a designer favourite for fifteen years and is not going away.
Edge pulls
Edge pulls are the minimalist choice. They fit under the top edge of a door so the cabinet face stays completely clean. They suit handle-free contemporary kitchens, integrated appliances, and anyone who wants to avoid visual clutter. The downsides: they are harder to install (the door has to be drilled from the back at a specific angle), they can dig into your fingers if the edge is not softened, and they do not work on inset cabinets where the door sits flush with the frame.
Who should skip the trendy stuff
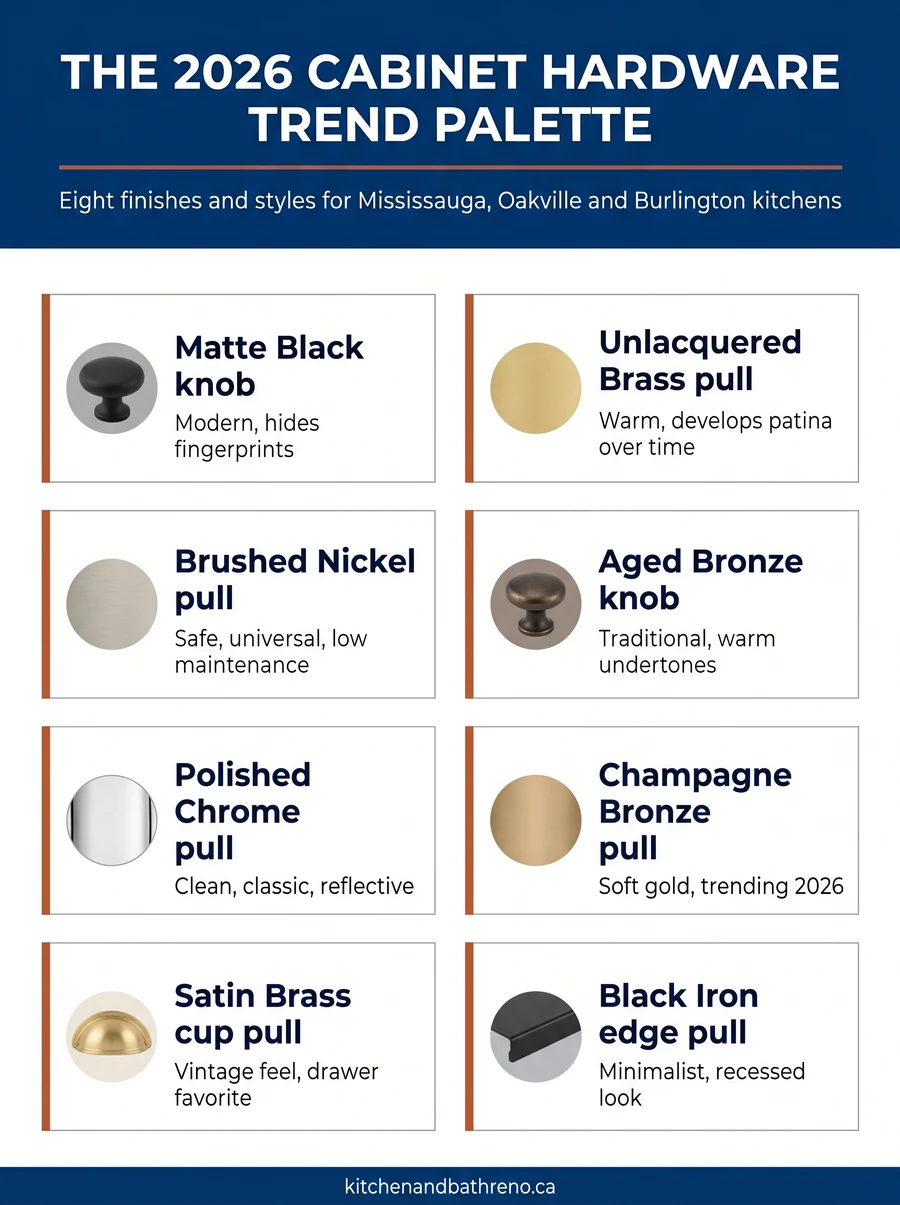
Unlacquered brass is the trend everyone keeps asking about. It is gorgeous in editorial photos, develops a patina over time, and reads as quietly expensive. It is also a real commitment. Unlacquered brass means the metal is exposed and oxidizes when it meets your skin oils, dish soap, and humidity. The patina some people love is the same patina others hate. If you wipe down your hardware every other day with a microfibre cloth, you will see uneven darkening within six months. Live with it for ten years and it will look like a vintage British library cabinet.
If you are a renter, planning to sell within two years, or you simply hate watching things change, skip unlacquered brass and go for a sealed finish: brushed nickel, polished chrome, matte black, or lacquered champagne bronze. These look the same on day one and day 3,650.
Skip matte black if your kitchen has very dark cabinets, since the hardware will disappear visually. Skip polished chrome if you do not want to wipe water spots off the finish constantly. And skip vintage cup pulls on contemporary flat-panel doors. The styles fight each other and the kitchen never quite settles into a coherent look.
Save your money
You do not need designer hardware on every cabinet to get a designer look. A common trick: buy 4 to 6 statement pieces (premium brass or hand-forged iron) for the focal area, usually the island or the run of drawers below the cooktop, and use a quality mid-range bar pull (10 to 14 dollars each) on the rest. The eye reads the statement pieces and assumes the whole kitchen is at that tier. You will spend 200 to 350 dollars instead of 900.
How to mix knobs, pulls and cup pulls
Mixing is allowed and often looks better than going single-style across the whole kitchen. The rules are simpler than designers make them sound. Pick one metal finish and stay with it across every piece. Mixing matte black knobs with brushed nickel pulls almost never works. If you want two finishes, separate them by zone: brass on the island, black on the perimeter, for example. Two zones, two finishes.
Pick the right hardware type for the function. Drawers want pulls or cup pulls. Doors can take knobs or pulls. The most common professional combo in Oakville and Burlington kitchen renovations is knobs on upper doors, bar pulls on lower doors, and bar pulls on drawers (longer pulls on wider drawers). It is the safest professional default and it works on 80% of kitchens.
For placement, knobs go 2.5 inches in from the corner of the door (the corner closest to where the door opens). Pulls on drawers centre horizontally. Pulls on doors mount 2.5 to 3 inches up from the bottom edge for upper cabinets, and 2.5 to 3 inches down from the top edge for lower cabinets. Consistency matters more than the exact number. Once you pick a measurement, use it on every door in the kitchen.
Knobs vs pulls vs cup pulls vs edge pulls
| Knob | Bar pull | Cup pull | Edge pull | |
|---|---|---|---|---|
| Cost per piece | $3 to $25 | $6 to $40 | $8 to $45 | $10 to $50 |
| Install effort | Low (one hole) | Medium (two holes, exact spacing) | Medium | High (angled drilling) |
| Kitchen style suits | Traditional, transitional, upper doors | Modern, Shaker, anywhere | Traditional, farmhouse, drawers only | Minimalist, contemporary, handle-free look |
| Grip comfort | Fair (pinch grip) | Excellent (four-finger) | Good (curl grip) | Fair (edge-only) |
The bar pull wins on universal fit and grip comfort, the knob wins on cost and simplicity, the cup pull wins on drawer aesthetics, and the edge pull wins on minimalism. Most kitchens end up using two of these together.
Hardware count calculator
Enter your cabinet door and drawer counts and pick a budget tier. The calculator returns the total pieces you need to order (with a small overage allowance) and a budget range for that quantity.
Cabinet hardware count and budget
Estimate only. Add 2 to 4 extra pieces to your order for damaged-box replacements.
Download the free worksheet
Print the cabinet hardware selection worksheet and walk through every decision with the contractor or in the showroom.
Cabinet Hardware Selection Worksheet (PDF)Please note: This article is for general guidance only. Costs, product availability, and finish trends change frequently. Kitchen and Bath Reno is not liable for outcomes from actions taken based on this content. Always confirm specifications, sizing and installation suitability with a qualified renovation professional for your specific kitchen.
Frequently asked questions
Sources and references
- National Kitchen and Bath Association – NKBA design and ergonomic standards for residential kitchens
- Top Knobs – Top Knobs cabinet hardware sizing and installation reference
- Atlas Homewares – Atlas Homewares cabinet hardware product catalogue
The verdict: hardware is the cheapest decision in your kitchen renovation that most homeowners overthink. Match your faucet finish, stick to one or two metals, pick bar pulls or knobs that feel good in the hand, and you will be happy with the result a decade from now.
Book a free renovation consultation